
How to Start Knitting: Needles, Yarn, and Your First Scarf
A friendly, step-by-step guide for people who have never knit a single stitch.
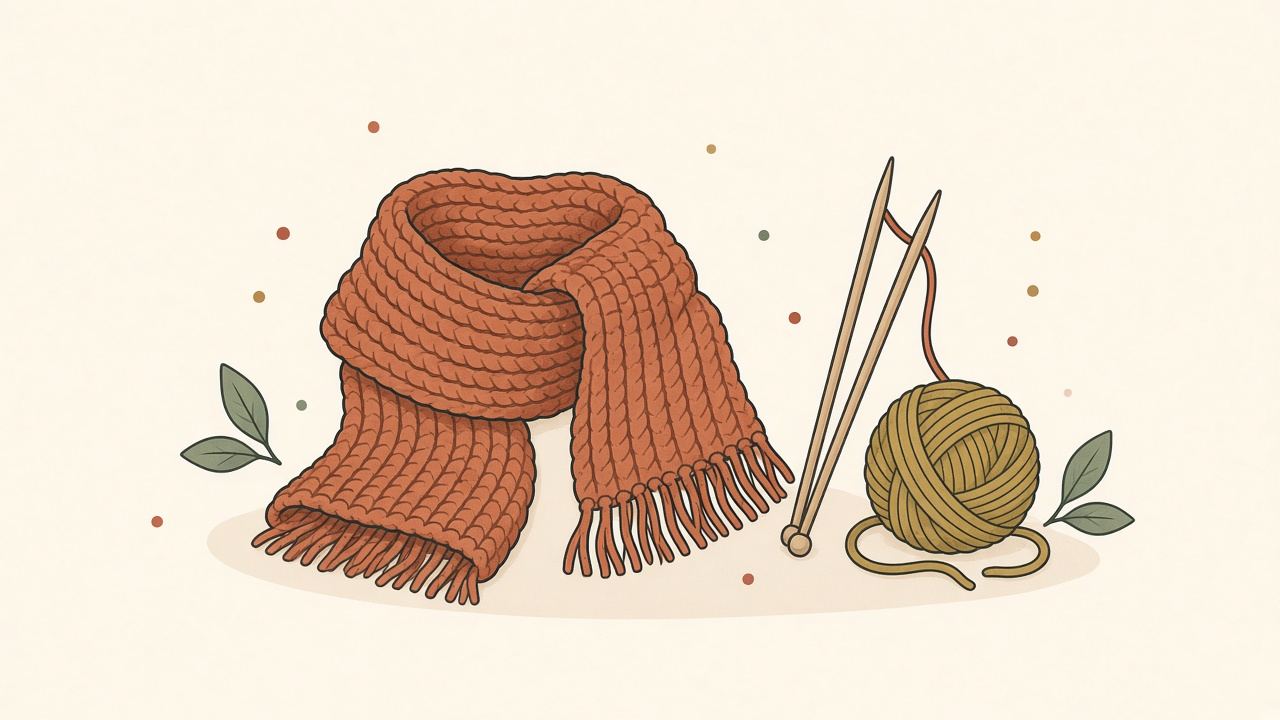
Knitting can look mysterious from the outside. The good news is that almost everything starts with one stitch: the knit stitch. Learn it well, and you can make a cozy scarf, a dishcloth, or a blanket.
This guide covers what to buy, how to cast stitches onto your needle, how to knit, and how to finish. Then we'll put it all together in a simple scarf. Your first rows will be uneven. That's not a sign you're bad at this. It's just what first rows look like.
A quick note on terms: This guide uses US knitting terms. Most stitch names are the same in the UK, but a few words differ. Where they do, you'll see the UK word in brackets, like this: bind off [UK: cast off].
Part 1: Needles and Yarn
You can get started for about $15–$30. Most of that is yarn.
What to buy
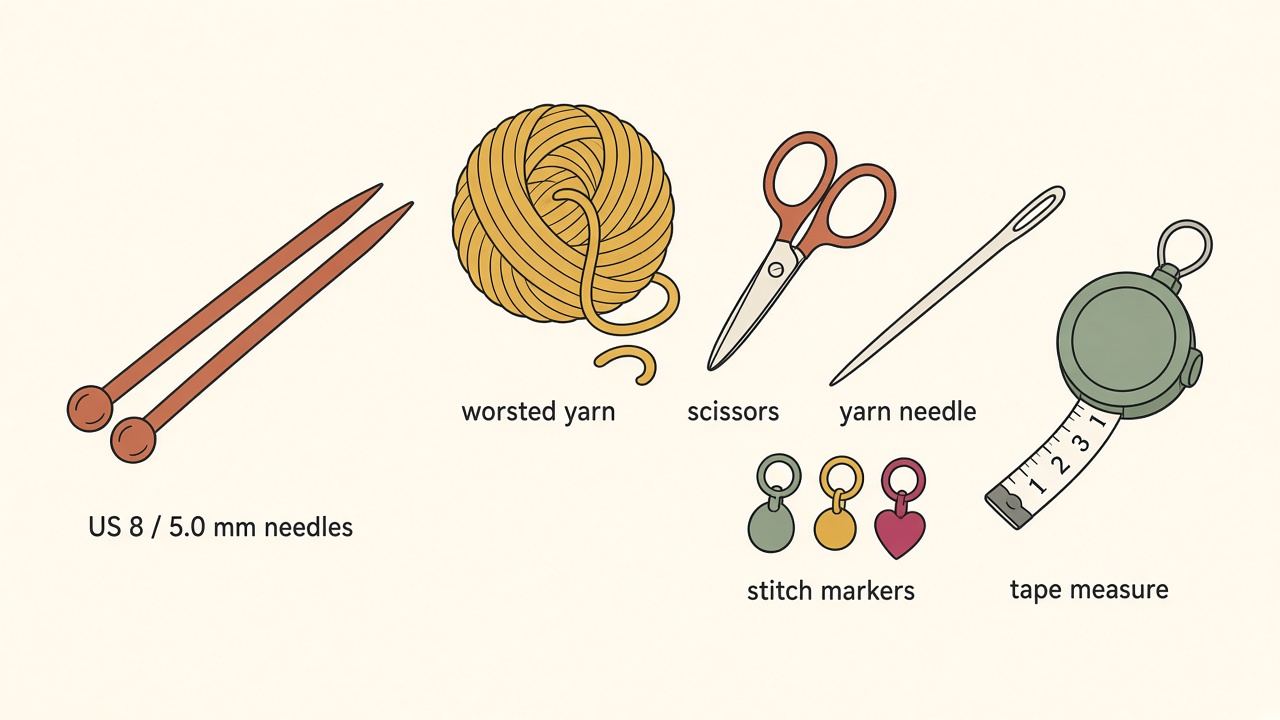
- One pair of straight needles, US size 8 (5.0 mm), about 10 in (25 cm) long. Bamboo or wood is best for beginners. It's a little "grippy," so stitches don't slide off as easily as they do on shiny metal.
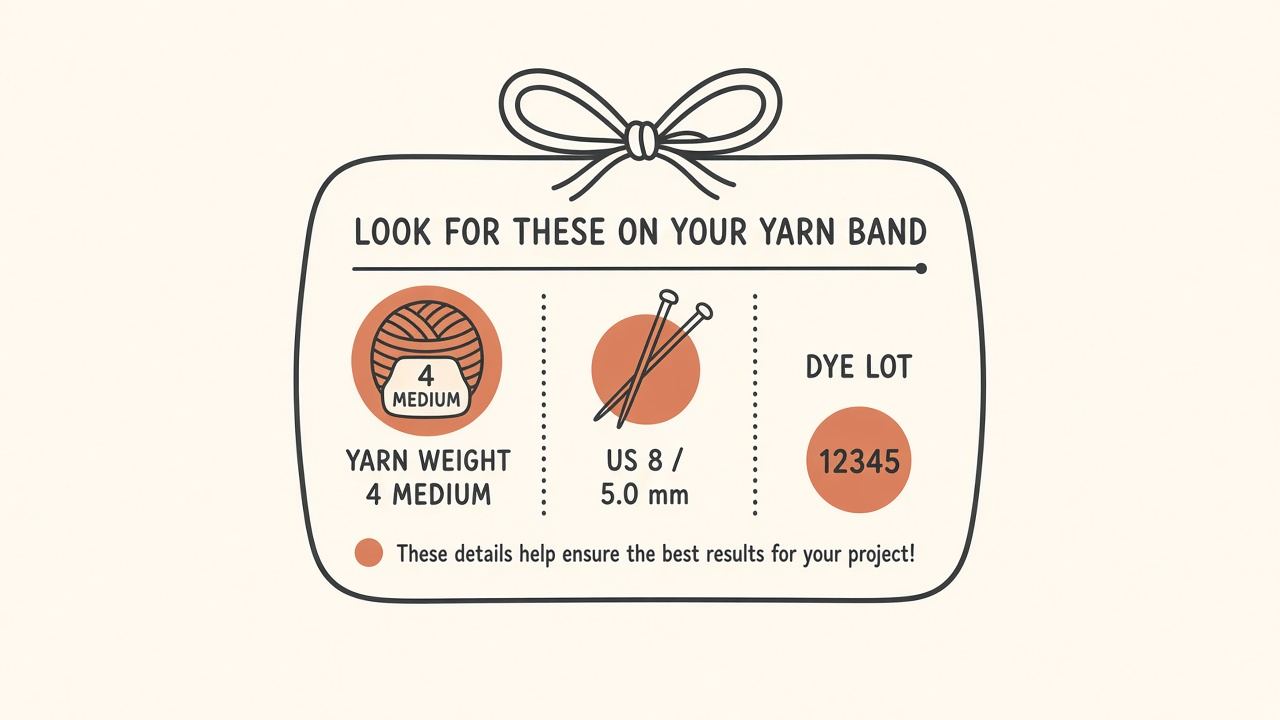
- Smooth, light-colored worsted weight yarn. For the scarf below, you'll need about 400–450 yards (365–410 m), usually 2–3 balls. Buy them all at once, from the same dye lot (a number printed on the label), so the color matches.
- Scissors.
- A yarn needle (also called a tapestry needle), a big blunt needle for weaving in ends.
- Optional: a few stitch markers and a tape measure.
Understanding needle sizes
Needles are labeled in millimeters (mm), and in the US also with a number. The millimeter size is the most reliable.
| US size | Metric | Good for |
|---|---|---|
| US 7 | 4.5 mm | Lighter worsted / DK yarn |
| US 8 | 5.0 mm | Worsted yarn (great first needles) |
| US 9 | 5.5 mm | Worsted yarn, slightly looser fabric |
| US 10 | 6.0 mm | Heavier worsted / aran |
In the UK, needles are sold in millimeters. (Older UK needles used a different numbering system where bigger numbers mean thinner needles, so go by the mm size if you inherit a vintage set.)
Straight, circular, or double-pointed?
- Straight needles are what this guide uses. They're simple and easy to hold.
- Circular needles (two short needles joined by a cable) are great later, for hats and big projects. You can knit back and forth on them just like straight needles.
- Double-pointed needles (DPNs) are for small tubes like sock and hat tops. Save these for later.
Understanding yarn weight
"Weight" means how thick the yarn is. US labels often show a number from 0 to 7 inside a little ball of yarn symbol.
- Worsted weight (#4, "Medium") is the best place to start. In the UK, the closest match is aran.
- Check the label. It usually suggests a needle size. If it says 5.0 mm or US 8, you're set.
Tips for choosing your first yarn
- Light, solid colors make your stitches easy to see.
- Smooth yarn is easiest. Skip fuzzy, bumpy, or "eyelash" yarns for now.
- Wool, acrylic, or a blend all work well for a scarf. Acrylic is affordable and machine-washable. Wool is warm and a little springy, which makes uneven stitches look neater. Cotton is great for dishcloths but less stretchy, so it's harder on your hands for a first scarf.
Part 2: Holding the Needles and Yarn
There are two main styles. Both make the same stitches.
- English style ("throwing"): hold the working yarn in your right hand and wrap it around the needle with your fingers. Many beginners find this easiest to follow, and it's the style this guide uses.
- Continental style ("picking"): hold the yarn in your left hand and scoop it with the needle tip. Crocheters often find this feels familiar.
Holding the needles
- The needle holding the stitches you're about to work goes in your left hand.
- The empty needle (the "working needle") goes in your right hand.
- Hold both lightly, from above, a bit like you'd hold a pair of chopsticks resting in your palms. No death grip needed.
Holding the yarn (English style)
- Let the working yarn (the strand coming from the ball) run over your right index finger.
- Loosely tuck it under your middle and ring fingers, or wrap it once around your little finger, to give it a little tension (how snugly the yarn feeds through your fingers).
- You'll use your index finger to flick or wrap the yarn around the needle.

- Stitches sit on the left needle
- Yarn over the right index finger
- Right hand holds the working needle
Tension tip: If your stitches are so tight they barely slide along the needle, relax your grip on the yarn. If they're big and loopy, add a wrap around a finger. This settles down with practice. (You may also see the word gauge [UK: tension] in patterns. It means how many stitches fit in an inch, and you don't need to worry about it for a scarf.)
Part 3: Your First Skills
Practice each of these on a little test piece of 15–20 stitches before you start your scarf. Knitters call a test piece a swatch.
1. The slip knot
Your very first stitch on the needle.
- Make a loop with the yarn, crossing the tail over the working yarn.
- Reach through the loop and pull a bit of the working yarn back through, making a new loop.
- Slide that new loop onto one needle and gently pull both ends to snug it. It should slide easily, not choke the needle.
Watch it step by step:
Unlike crochet, in knitting the slip knot counts as your first stitch.
2. Casting on (the knitted cast-on)
"Casting on" puts your starting row of stitches on the needle. There are many methods. The knitted cast-on is a great first one because it uses the same movement as the knit stitch, so you're practicing two skills at once.
With the slip knot on your left needle:
- Insert the tip of the right needle into the front of the slip knot, going from left to right and front to back, so the right needle sits behind the left needle.
- With your right hand, wrap the working yarn counterclockwise around the right needle tip (from back to front, ending between the two needles).
- Gently pull the right needle toward you, bringing the wrapped yarn through the stitch as a new loop. Don't drop the old stitch.
- Slip the new loop onto the left needle, next to the slip knot. Snug it gently.
- Repeat steps 1–4, always working into the newest stitch on the left needle, until you have as many stitches as you need.
Watch it step by step:
Keep it loose. A tight cast-on is the most common beginner frustration. If you struggle to get your needle in, try casting on with a needle one or two sizes bigger, then switch back to your regular needles to knit.
3. The knit stitch (k)
UK: knit (same name)
This is the heart of knitting: four moves, In, Around, Through, Off.
Tip: remember them with the rhyme "In through the front door, around the back, out through the window, and off jumps Jack."
With your cast-on stitches on the left needle, and the working yarn hanging at the back:
- In: Insert the right needle into the first stitch on the left needle, from left to right and front to back. The right needle crosses behind the left.
- Around: Wrap the working yarn counterclockwise around the right needle, from back to front, so it comes between the two needle tips.
- Through: Gently bring the right needle tip back toward you, pulling the wrapped yarn through the stitch. You now have a new loop on the right needle.
- Off: Slide the old stitch off the left needle. The new stitch stays on the right needle.
Watch it step by step:
That's one knit stitch. Repeat into every stitch until the left needle is empty and all the stitches are on the right needle. That's one row.
To start the next row: swap needles. Move the full needle to your left hand and the empty one to your right, and start again. That's it. No turning chain like crochet.
4. Garter stitch: knitting every row
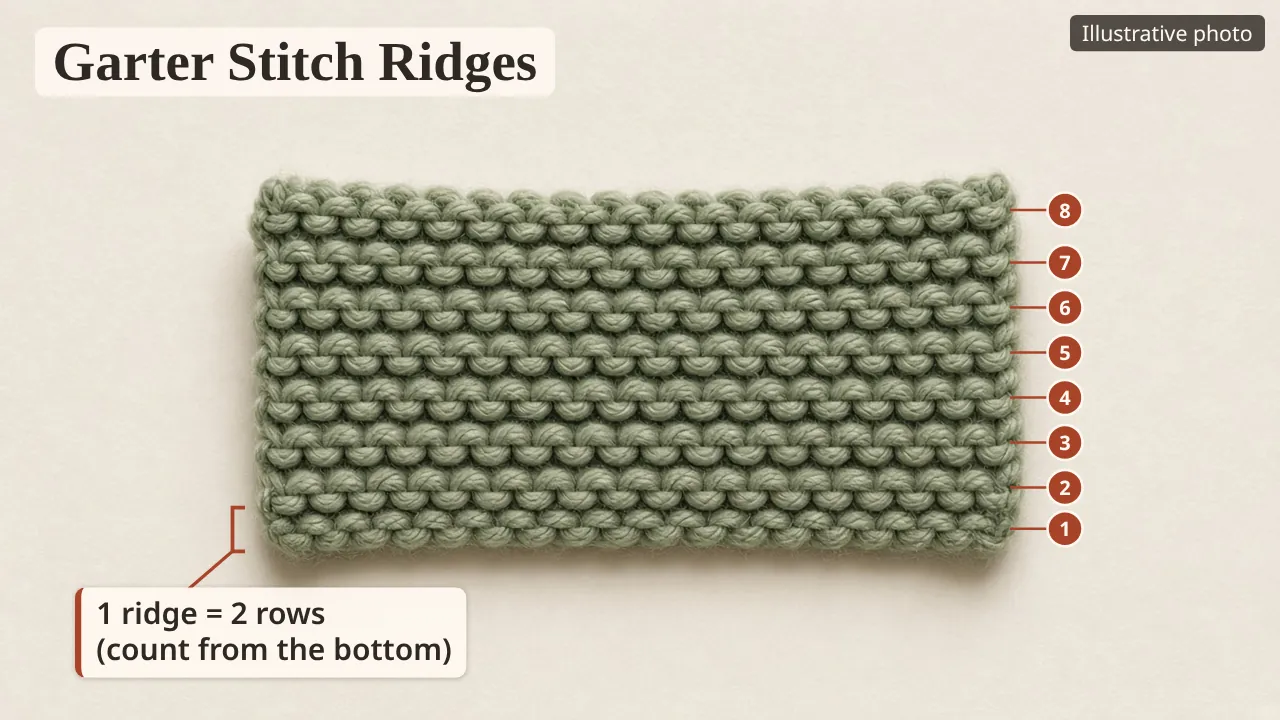
When you knit every stitch of every row, you get garter stitch: a squishy, bumpy, reversible fabric that lies flat and doesn't curl. It's perfect for a first scarf.
How to count rows in garter stitch: each bumpy horizontal ridge equals 2 rows. So 10 ridges = 20 rows.
5. Binding off [UK: casting off]
Binding off finishes the live stitches so they can't unravel.
- Knit the first 2 stitches as usual. You now have 2 stitches on the right needle.
- Insert the tip of the left needle into the first stitch you knit (the one farther from the tip) on the right needle.
- Lift that stitch over the second stitch and off the right needle. One stitch remains on the right needle.
- Knit 1 more stitch (you have 2 on the right needle again), then repeat steps 2–3.
- Continue until there's just 1 stitch left on the right needle and none on the left.
- Cut the yarn, leaving a 6-inch (15 cm) tail. Pull the tail through the last loop and tug gently to close it.
Watch it step by step:
Tip: Bind off loosely. If your edge is tight and puckers, try binding off with a needle one size bigger.
Part 4: Your First Project: A Garter Stitch Scarf
Knit every row. No fancy pattern to track, just your stitches. It's the classic first project for a reason.
A friendly heads-up: A scarf is a lot of rows, and some beginners get a little bored halfway. That's normal! If you'd like a quicker first win, knit a dishcloth first using the same steps (cotton yarn, cast on 35, knit until it's square), then come back to the scarf. Or make your scarf shorter and call it a neck warmer. You decide.
You'll need
- About 400–450 yards (365–410 m) of worsted weight (#4) wool, acrylic, or wool-blend yarn, usually 2–3 balls from the same dye lot
- US 8 (5.0 mm) straight needles
- Scissors, a yarn needle, and a tape measure
Finished size: about 6 in (15 cm) wide and 55–60 in (140–150 cm) long. Exact width depends on your tension, and that's completely fine for a scarf.
Skills used: slip knot, knitted cast-on, knit stitch (k), bind off [UK: cast off]
Instructions
Cast on: Make a slip knot, leaving a 6-inch tail. Using the knitted cast-on, cast on 26 stitches (the slip knot counts as stitch 1).
Row 1: Knit every stitch to the end. (26 stitches)
Row 2 and every row after: Swap needles and knit every stitch to the end. (26 stitches)
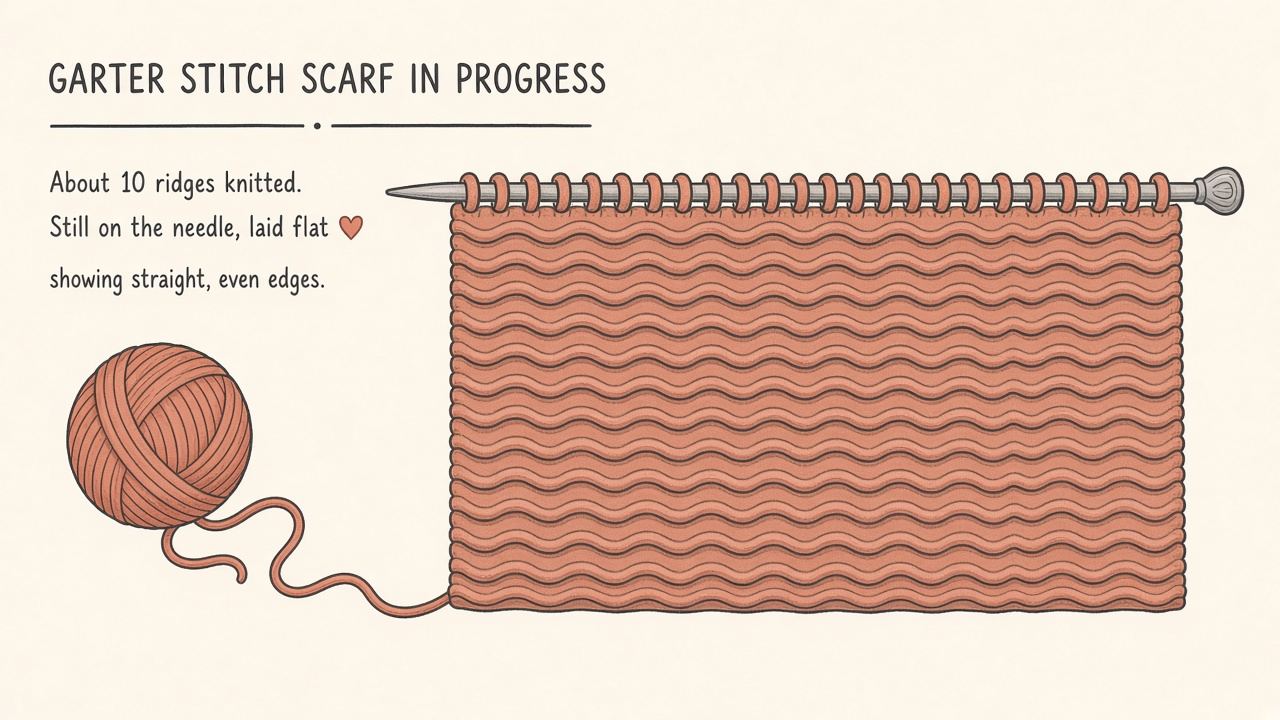
Keep going until the scarf measures about 55–60 inches (140–150 cm), or the length you like. Try it on around your neck as you go.
Joining a new ball: When your ball runs low, stop at the end of a row with at least 6 inches of yarn left. Start the next row with the new ball, leaving a 6-inch tail. Gently tie the two tails together in a loose, temporary knot to keep things snug. You'll untie and weave them in at the end.
Bind off: Bind off all stitches loosely. Cut the yarn, leaving a 6-inch tail, and pull it through the last loop.
Weave in the ends: Thread each tail onto your yarn needle. Weave it in and out along the bumps of the edge or through the back of the stitches for about 2 inches, then go back the other way for a little bit. Trim what's left.

- Blunt needle weaves the tail through the edge stitches
- Trim after several ridges
Congratulations—you knit a scarf! Wear it proudly, wobbles and all.
Keep yourself on track
- Count your stitches every few rows. You should always have 26.
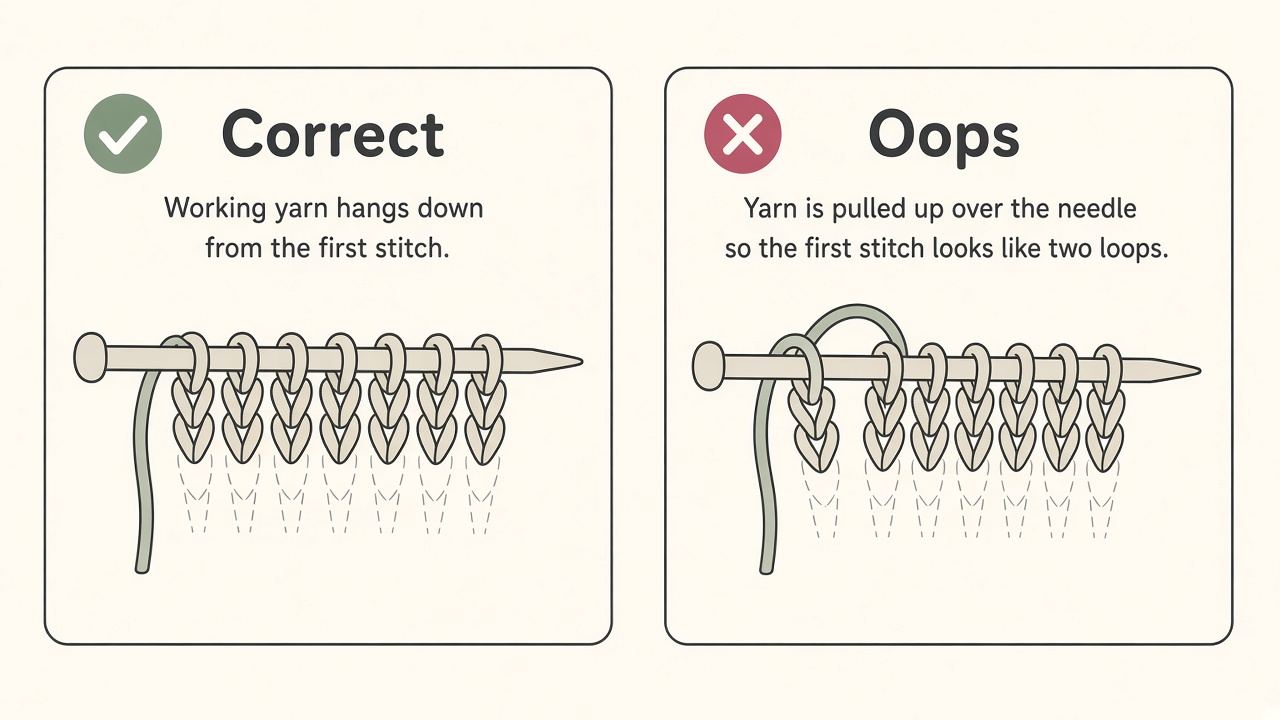
- Check where your working yarn is. At the start of each row, the yarn should hang down from the first stitch, toward the floor. If it's pulled up over the needle, it can look like two stitches and you'll accidentally add one.
- Stopping mid-row? Finish the row first if you can. If not, note that the working yarn is always attached to the right needle's last stitch, so you'll know which way to go.
Part 5: Common Beginner Mistakes (and How to Fix Them)
"My scarf is getting wider." You're accidentally adding stitches. The usual culprit is pulling the working yarn up and over the needle at the start of a row, which makes the first stitch look like two. Keep the yarn hanging down in front of you, toward the floor, before you start. Count every few rows so you catch it early.
"My scarf is getting narrower, or there's a hole or a ladder." You probably dropped a stitch (it slid off the needle without being knit). Catch the loose loop with a safety pin or locking stitch marker right away so it can't unravel further. Then you can either ladder it back up with a crochet hook or "tink" back to it (see below).
"I made a mistake a few stitches back." Un-knit, one stitch at a time. Knitters call this tinking ("knit" spelled backwards). Insert the left needle into the stitch below the one on the right needle, slide the right needle out, and gently pull the yarn free. Repeat until you're past the mistake.
"My cast-on edge is tight and puckered." Very common. Cast on more loosely, or use a needle one or two sizes larger for the cast-on only.
"My stitches are so tight I can't push the needle in." Relax your grip on the yarn, and make sure each new stitch forms on the thick part of the needle (the shaft), not the skinny tip.
"My edges look messy and loopy." Totally normal at first and part of garter stitch's charm. They'll tidy up as your tension evens out.
"My hands and shoulders ache." Loosen up, drop your shoulders, and take breaks. Knitting should feel relaxing, not like a workout.
Part 6: Where to Go Next
Once your scarf is done (or you've decided it's a neck warmer!), here's a gentle path forward:
- Knit a garter stitch dishcloth in cotton for a quick, useful win.
- Learn the purl stitch (p) [UK: purl, same name]. It's the knit stitch's mirror image. Knit one row and purl the next, and you get stockinette stitch [UK: stocking stitch], the smooth "V" fabric you see on most sweaters.
- Try ribbing (alternating knit and purl stitches in the same row). It's stretchy and perfect for hat brims and cuffs.
- Learn the long-tail cast-on. It's the most popular all-purpose cast-on and makes a neat, stretchy edge.
- Knit a simple hat on circular needles. Many knitters find a hat a faster, more satisfying second project than another scarf.
- Learn to read pattern abbreviations. Patterns use short forms like k (knit), p (purl), st (stitch), CO (cast on), BO (bind off), and rep (repeat). Most patterns include a key.
- Browse our beginner pattern directory. Every pattern is picked for brand-new knitters and labeled with the skills it uses and roughly how long it takes, so you can choose your next project with confidence.
Above all, be kind to yourself. Every beautiful sweater you've ever admired was knit by someone who once had a lumpy first scarf. Keep going. Your hands will learn faster than you think.
Happy knitting!